728x90
반응형
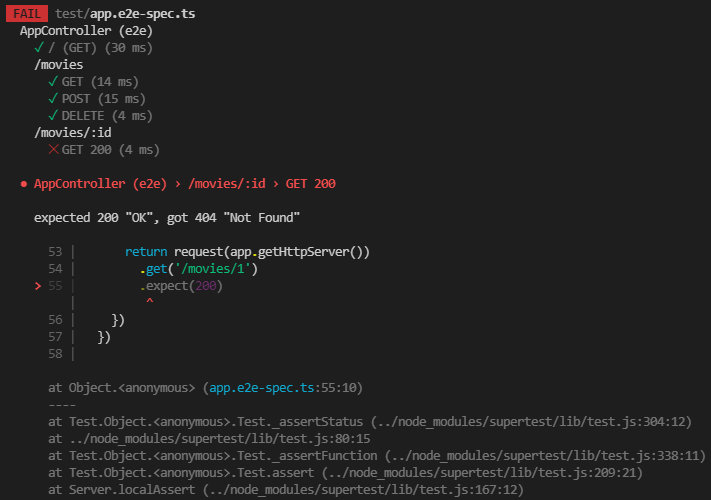
DELETE와 PATCH도 추가해보자.
DELETE를 먼저 테스트 수행하면 남아있는 데이터가 없기 때문에 PATCH부터 작성한다.
  describe('/movies/:id',() => {
    it('GET 200', () => {
      return request(app.getHttpServer())
        .get('/movies/1')
        .expect(200)
    });
    it('GET 404', () => {
      return request(app.getHttpServer())
        .get('/movies/999')
        .expect(404)
    });
    it('PATCH 200', () => {
      return request(app.getHttpServer())
        .patch('/movies/1')
        .send({ title : 'Updated Test'})
        .expect(200)
    });
    it('DELETE 200', () => {
      return request(app.getHttpServer())
        .delete('/movies/1')
        .expect(200);
    });
  });
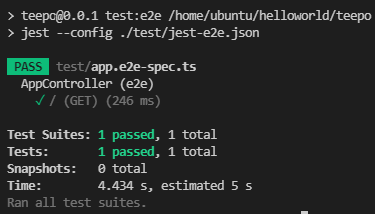
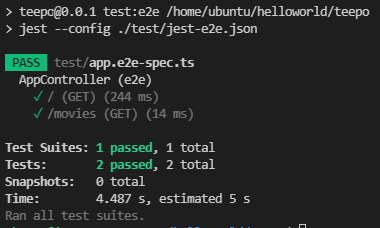
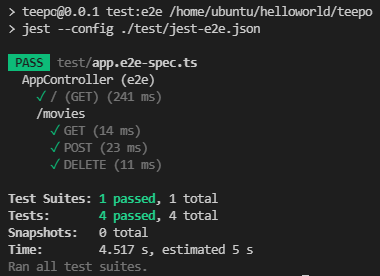
테스트를 수행해보면
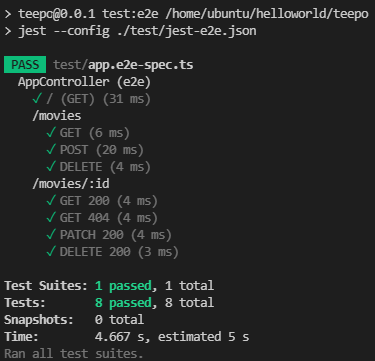
정상으로 작동했다.
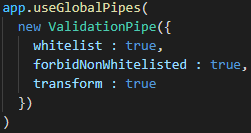
이번에는 잘못된 데이터를 가진 movie를 create하는지 테스트해보자.
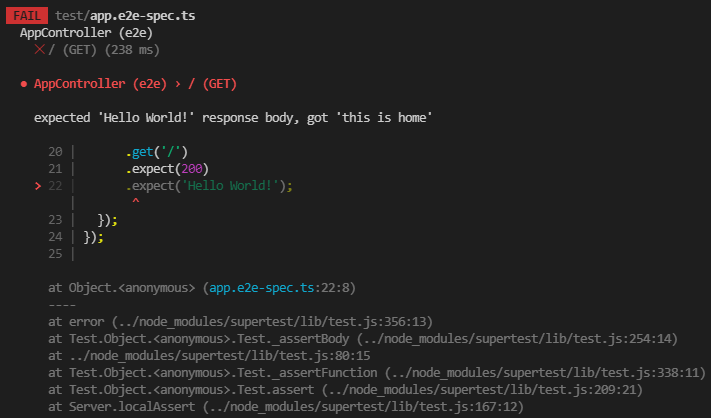
  describe('/movies', () => {
    it('GET',() => {
      return request(app.getHttpServer())
        .get('/movies')
        .expect(200)
        .expect([]);
    });

    it('POST 201',() => {
      return request(app.getHttpServer())
        .post('/movies')
        .send({
          title: 'Test Movie',
          genres: ['test'],
          year: 2000
        })
        .expect(201)
    });

    it('POST 400',() => {
      return request(app.getHttpServer())
        .post('/movies')
        .send({
          title: 'Test Movie',
          genres: ['test'],
          year: 2000,
          other: "thing"
        })
        .expect(400)
    });

    it('DELETE', () => {
      return request(app.getHttpServer())
        .delete('/movies')
        .expect(404)
    });
  });
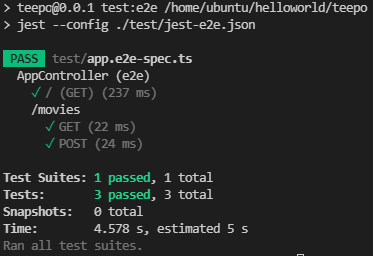
테스트를 수행해보면

정상적으로 작동하였다.
728x90
반응형
'Back-End > Nest.js' 카테고리의 다른 글
| Nest.js | MongoDB | Model,Schema,Controller (0) | 2021.10.06 |
|---|---|
| Nest.js | MongoDB | Schema (0) | 2021.10.06 |
| Nest.js | E2E TESTING | Testing GET movies id (0) | 2021.09.30 |
| Nest.js | E2E TESTING | Movies 테스트 (0) | 2021.09.30 |
| Nest.js | UNIT TESTING | Delete and Create (0) | 2021.09.30 |