728x90
반응형
JS에서 문제가 생기는것을 막기 위해 ts파일에서 만든 interface들은 js로 컴파일되지 않는다.
다만 js파일에 interface를 넣고 싶을 때 우리는 Class를 이용할 수 있다. index.ts파일을 다음과 같이 바꿔보자.
index.ts
class Human {
public name: string;
public age: number;
public gender: string;
constructor(name:string, age:number,gender?:string) {
this.name = name;
this.age = age;
this.gender = gender;
}
}
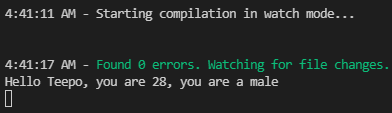
const person = new Human("Teepo",28,"male")
const sayHi = (person: Human):string => {
return `Hello ${person.name}, you are ${person.age}, you are a ${person.gender}`
}
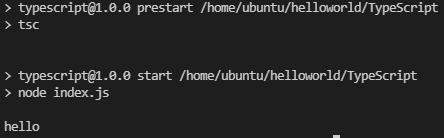
console.log(sayHi(person))
export {};
하나씩 분석해보자.
1. 먼저 Human이란 Class를 선언했고, 각각의 속성에 타입을 지정해주었다. public은 객체지향 언어의 특징중 하나인 접근 지정자로써, 자세한 내용은 검색을 통해 알 수 있다. constructor는 생성자로 클래스가 호출 될 때마다 실행이 되는 메소드이다.
class Human {
    public name: string;
    public age: number;
    public gender: string;
    constructor(name:string, age:number,gender?:string) {
        this.name = name;
        this.age = age;
        this.gender = gender;
    }
}
2. person이라는 Human 클래스의 인스턴스를 만들어준다 여기서 인자값으로 지정해준 것들이 생성자가 실행되어 인스턴스가 각각의 속성으로 가지게 된다.
const person = new Human("Teepo",28,"male")
3. 함수를 선언할 때 인자값의 타입을 Human 클래스로 지정한다. 그다음 클래스가 가지는 속성으로 파라미터들을 지정해준다.
const sayHi = (person: Human):string => {
    return `Hello ${person.name}, you are ${person.age}, you are a ${person.gender}`
}
728x90
반응형
'Typescript > 이론' 카테고리의 다른 글
| TypeScript | 이론 | Interfaces (0) | 2021.10.05 |
|---|---|
| TypeScript | 이론 | Types (0) | 2021.10.05 |
| Typescript | 이론 | 세팅하기 (0) | 2021.10.05 |