로그인
1. 카카오 디벨로퍼 로그인
https://developers.kakao.com/
Kakao Developers
카카오 API를 활용하여 다양한 어플리케이션을 개발해보세요. 카카오 로그인, 메시지 보내기, 친구 API, 인공지능 API 등을 제공합니다.
developers.kakao.com
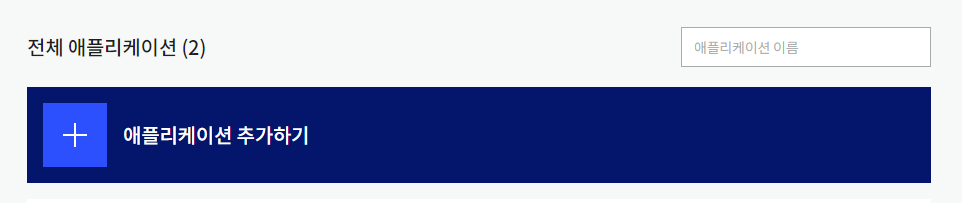
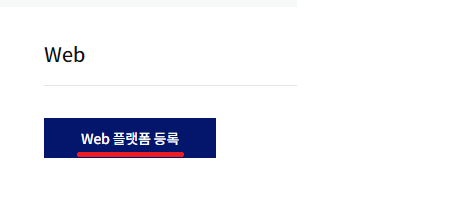
2. 애플리케이션 추가
3. 플랫폼 도메인 설정 후 등록하러가기 버튼 클릭

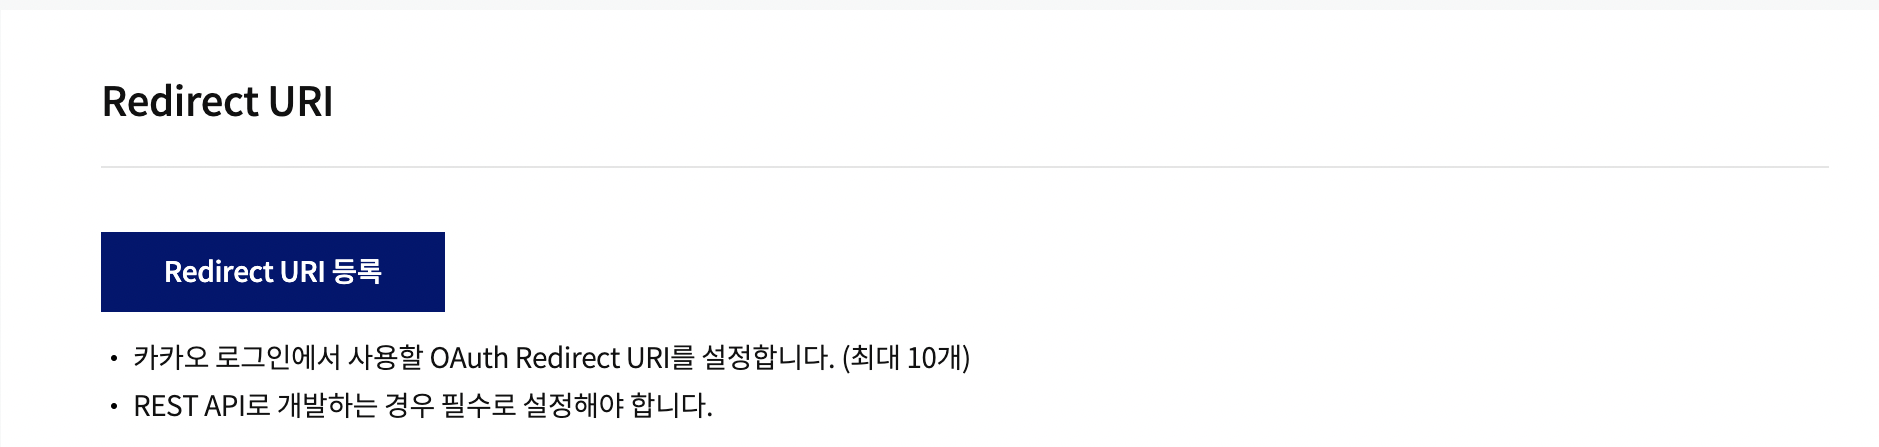
4. 로그인 활성화 및 Redirect URI 설정

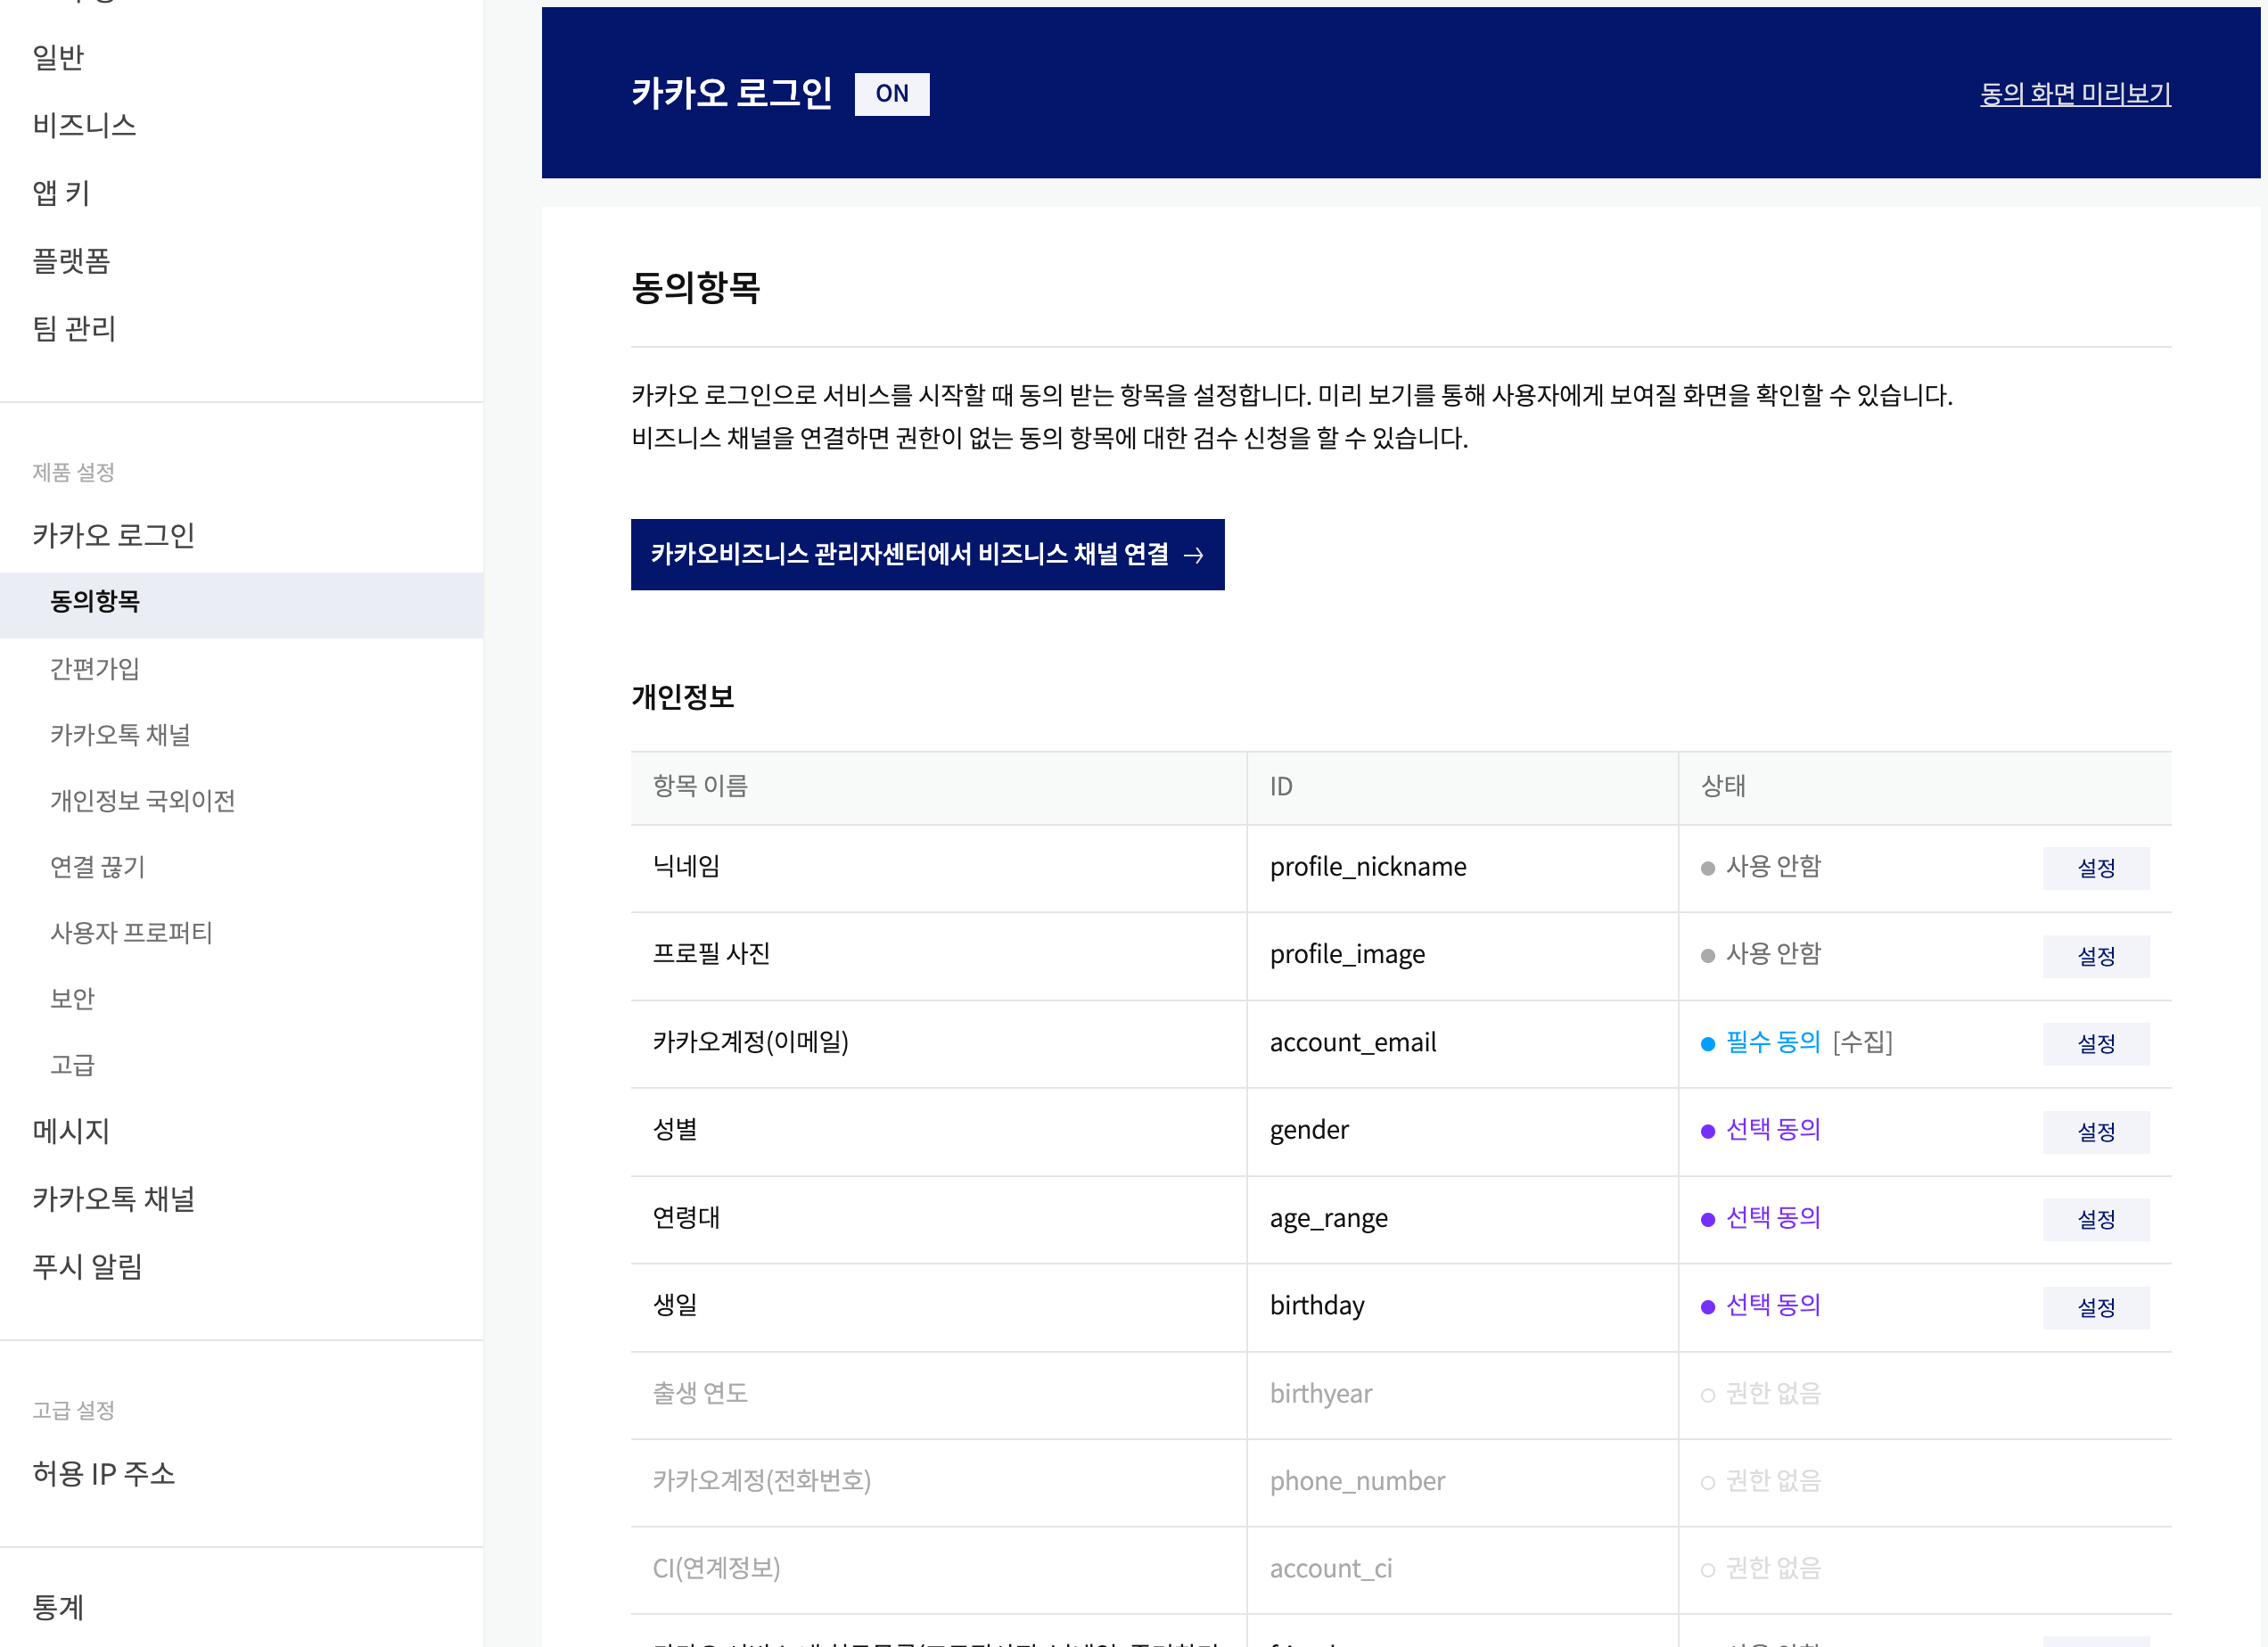
5. 동의 항목 설정
6. _app.tsx 파일에 script 추가
_app.tsx
const MyApp: NextPage<AppProps> = ({ Component, pageProps }: AppProps) => {


  return (
    <React.StrictMode>
      <Head>
        <title></title>
        <meta name="viewport" content="initial-scale=1.0, width=device-width" />

        <script src="https://developers.kakao.com/sdk/js/kakao.js"
          defer
        >
        </script>


      </Head >
      <ThemeProvider theme={Theme}>
          <Component {...pageProps} />
      </ThemeProvider>


    </React.StrictMode>
  );
};
7. 쿠키 생성 라우터 ( Back-end )
community.js
var express = require('express');
var router = express.Router();

const jwt = require("jsonwebtoken");

router.post("/login", async function (req, res, next) {

    const body = req.body;

    const tokenValue = {
        email: body.email
    }

    const token = jwt.sign({ isLogined: tokenValue }, "secretkey", {
        expiresIn: 86400000, // 토큰 제한시간
    });

    res.cookie("A12Ba5os9", token, {
        maxAge: 86400000, // 쿠키 제한시간
        path: "/",
        httpOnly: true,
    });

    return res.send({ success: true })
})

module.exports = router;
8. 컴포넌트에 구현
import { GetServerSideProps, NextPage } from "next";
import { useRouter } from "next/router";

const Community: NextPage<any> = (props: any) => {
    const router = useRouter();

    const kakaoInit = () => {
        const kakao = (window as any).Kakao;
        if (!kakao.isInitialized()) {
            kakao.init(process.env.NEXT_PUBLIC_KAKAO_SHARE_KEY);
        }

        return kakao;
    }

    const kakaoLogin = async () => {
        // 카카오 초기화
        const kakao = kakaoInit();

        // 카카오 로그인 구현
        kakao.Auth.login({
            success: () => {
                kakao.API.request({
                    url: '/v2/user/me', // 사용자 정보 가져오기
                    success: (res: any) => {
                        // 로그인 성공할 경우
                        if (!res.kakao_account.email || res.kakao_account.email === "") {
                            alert("해당 계정의 이메일이 존재하지 않습니다.")
                        }
                        else {
                        	// 쿠키 생성
                            await axios.post("/api/community/login", { email: res.kakao_account.email })
                                .then(({ data }) => {
                                    if (data.success) {
                                        dispatch({ name: "email", value: res.kakao_account.email })
                                    }
                                    else {
                                        return alert(" 로그인에 실패하였습니다.")
                                    }
                                })
                        }

                    },
                    fail: (error: any) => {
                        console.log(error);
                    }
                })
            },
            fail: (error: any) => {
                console.log(error);
            }
        })
    }

    return (
        <>
            <button onClick={(e: any) => { kakaoLogin(); }}>
                카톡으로 로그인
            </button>
        </>
    )
}

export default Community;

export const getServerSideProps: GetServerSideProps = async (context) => {
    return {
        props: {

        }
    }
}
/api 로 시작하는 라우터는 next.config.js 로 백엔드 프록시 설정을 해서 그렇습니다.
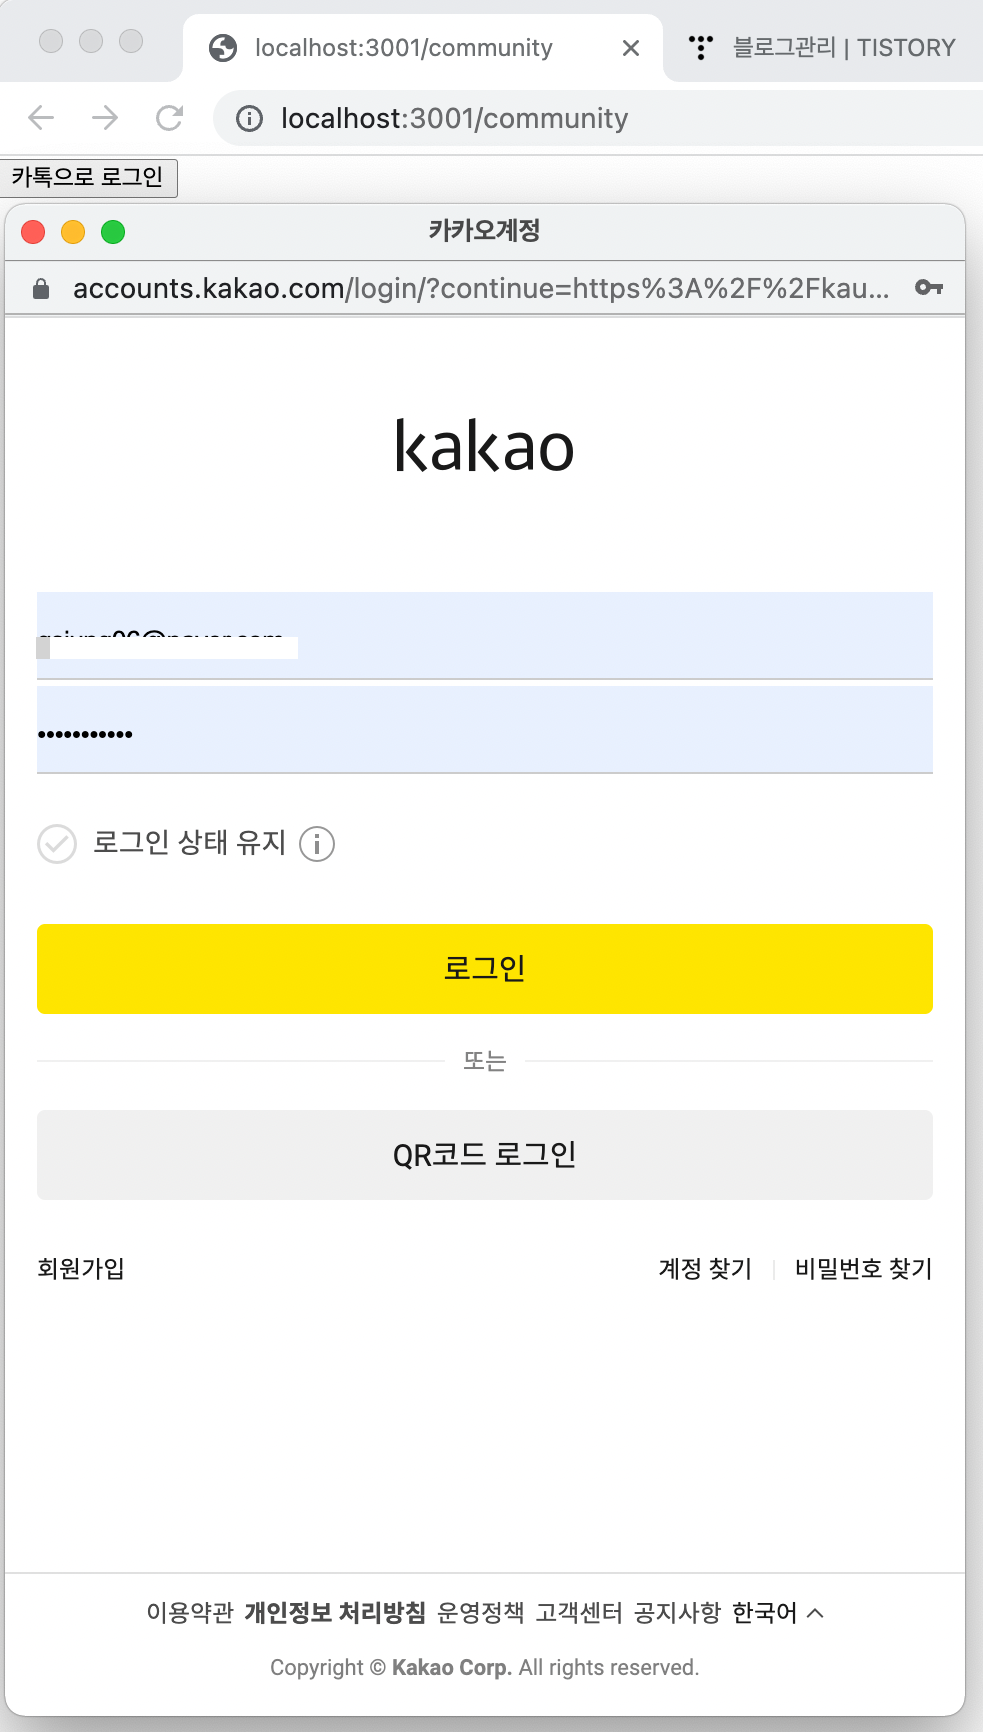
9. 확인하기
로그아웃
카카오 로그아웃은 이 사이트 뿐만 아니라 카카오 소셜 계정 자체를 로그아웃 시켜야 하는데,
https://developers.kakao.com/docs/latest/ko/kakaologin/rest-api#logout-of-service-and-kakaoaccount
Kakao Developers
카카오 API를 활용하여 다양한 어플리케이션을 개발해보세요. 카카오 로그인, 메시지 보내기, 친구 API, 인공지능 API 등을 제공합니다.
developers.kakao.com
카카오에서 제공하는 api를 사용해야 한다.
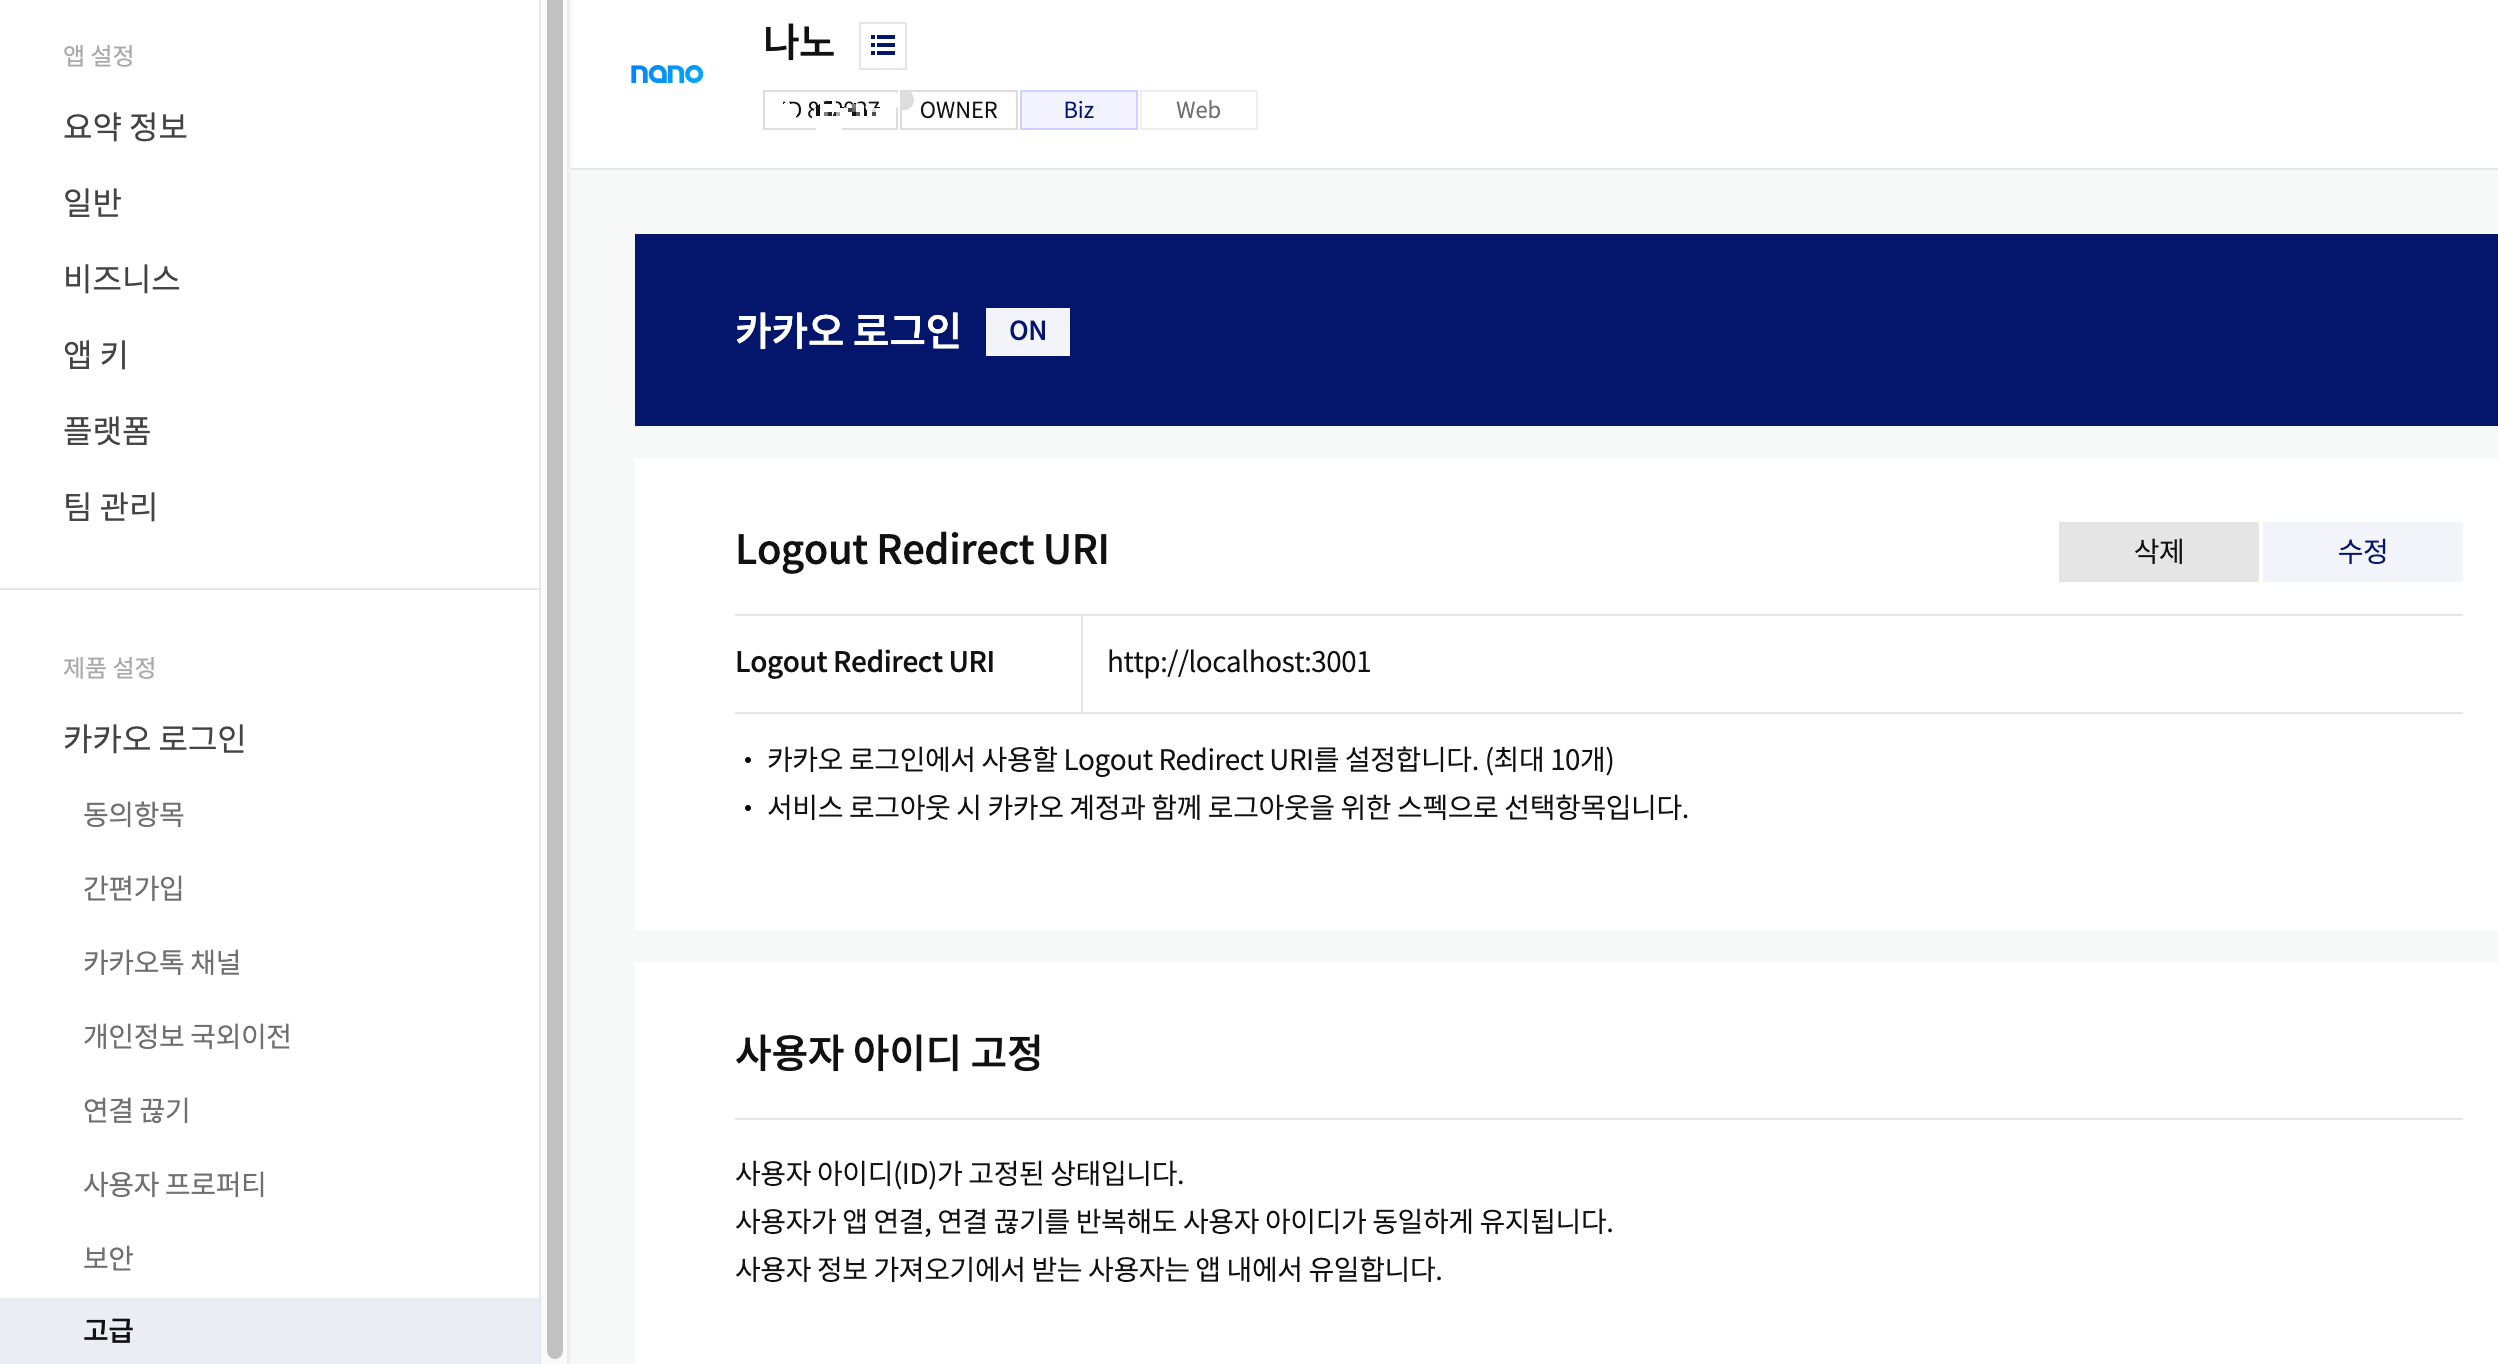
1. Logout Redirect URI 설정
2. 쿠키 삭제 라우터 ( Back-end )
var express = require('express');
var router = express.Router();

const jwt = require("jsonwebtoken");

router.post("/login", async function (req, res, next) {

    const body = req.body;

    const tokenValue = {
        email: body.email
    }

    const token = jwt.sign({ isLogined: tokenValue }, "secretkey", {
        expiresIn: 86400000, // 토큰 제한시간
    });

    res.cookie("A12Ba5os9", token, {
        maxAge: 86400000, // 쿠키 제한시간
        path: "/",
        httpOnly: true,
    });

    return res.send({ success: true })
})

router.post("/logout", async function (req, res, next) {

    res.clearCookie("A12Ba5os9");

    return res.send({ success: true })
})


module.exports = router;
3. 컴포넌트 구현
import { GetServerSideProps, NextPage } from "next";
import { useRouter } from "next/router";

const Community: NextPage<any> = (props: any) => {
    const router = useRouter();

    const kakaoInit = () => {
        const kakao = (window as any).Kakao;
        if (!kakao.isInitialized()) {
            kakao.init(process.env.NEXT_PUBLIC_KAKAO_SHARE_KEY);
        }

        return kakao;
    }

    const kakaoLogin = async () => {
        // 카카오 초기화
        const kakao = kakaoInit();

        // 카카오 로그인 구현
        kakao.Auth.login({
            success: () => {
                kakao.API.request({
                    url: '/v2/user/me', // 사용자 정보 가져오기
                    success: (res: any) => {
                        // 로그인 성공할 경우
                        if (!res.kakao_account.email || res.kakao_account.email === "") {
                            alert("해당 계정의 이메일이 존재하지 않습니다.")
                        }
                        else {
                        	// 쿠키 생성
                            await axios.post("/api/community/login", { email: res.kakao_account.email })
                                .then(({ data }) => {
                                    if (data.success) {
                                        dispatch({ name: "email", value: res.kakao_account.email })
                                    }
                                    else {
                                        return alert(" 로그인에 실패하였습니다.")
                                    }
                                })
                        }
                    },
                    fail: (error: any) => {
                        console.log(error);
                    }
                })
            },
            fail: (error: any) => {
                console.log(error);
            }
        })
    }

    const kakaoLogout = async () => {
        // 쿠키 제거
        await axios.post("/api/community/logout", state)
            .then(({ data }) => {
                if (data.success) {
                    dispatch({ type: "init" })
                    // 카카오 로그아웃 페이지
                    router.push(`https://kauth.kakao.com/oauth/logout?client_id=${process.env.NEXT_PUBLIC_KAKAO_SHARE_KEY}&logout_redirect_uri=http://localhost:3001`);
                }
                else {
                    return alert(" 로그아웃에 실패하였습니다.")
                }
            })
    }

    return (
        <>
            <button onClick={(e: any) => { kakaoLogin(); }}>
                카톡으로 로그인
            </button>
            <button onClick={(e: any) => { kakaoLogout(); }}>
                로그아웃
            </button>
        </>
    )
}

export default Community;

export const getServerSideProps: GetServerSideProps = async (context) => {
    return {
        props: {

        }
    }
}
로그인을 했을 경우 SSR로 props를 넘기면 쿠키 데이터를 읽어 로그인 된 상태를 구현할 수 있다.
( 로그인 or 로그아웃 버튼 보이게끔 하는거 구현 가능 )
4. 로그아웃
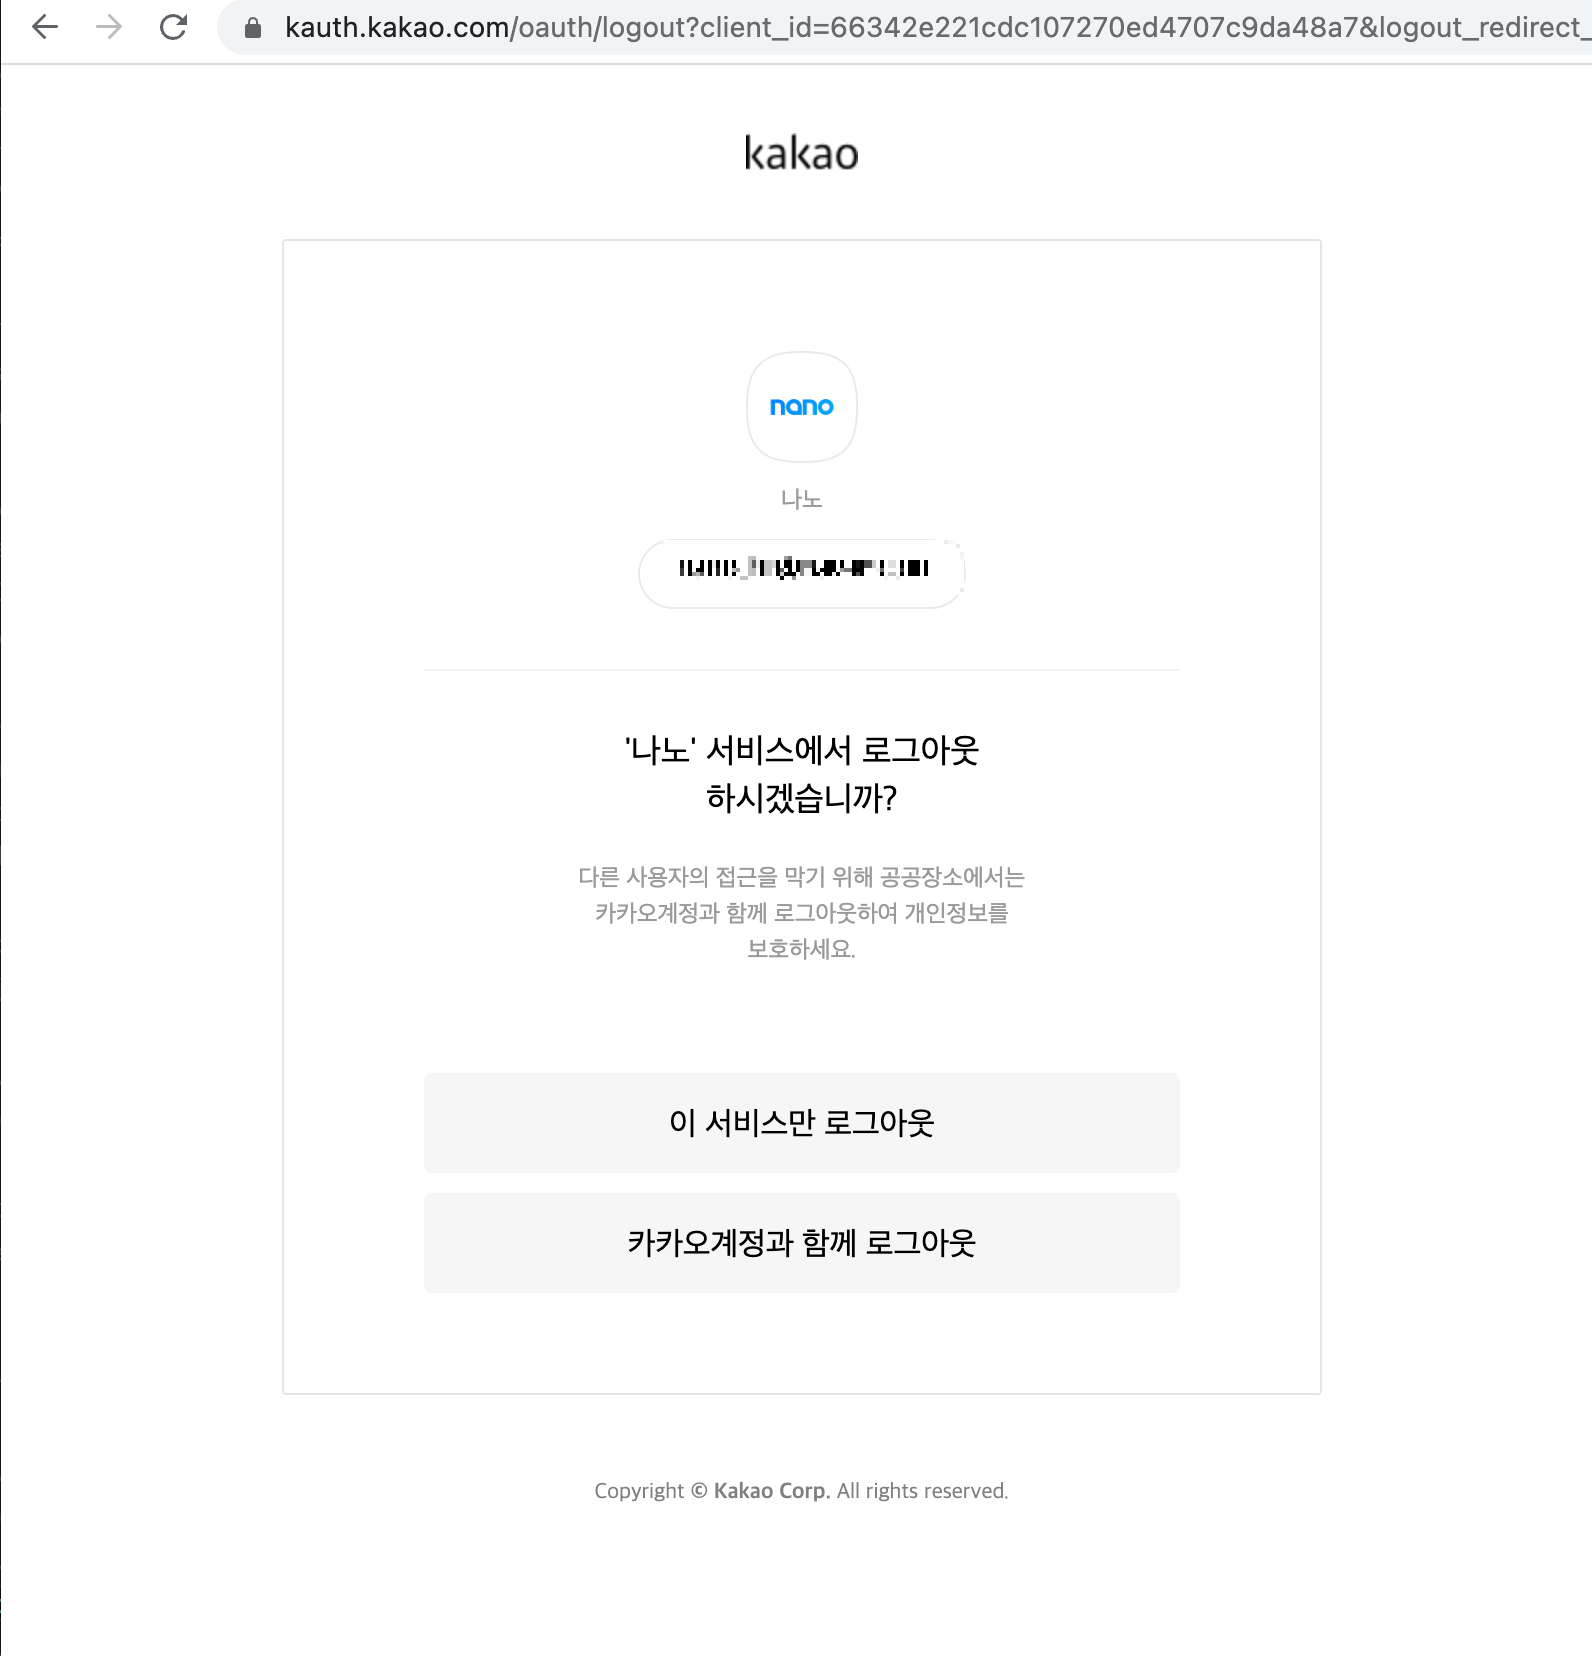
- 이 서비스만 로그아웃 : state 가 초기화 되었고, 쿠키가 삭제되었으므로 사이트는 로그아웃 됨. ( 하지만 로그인할 때 전에 했던 방식으로 로그인 됨 )
- 카카오계정과 함께 로그아웃 : 소셜 계정이 로그아웃 되어 다른 계정으로 로그인 가능